Showing posts with label make do and mend. Show all posts

Tuesday, 12 March 2013

My Make Do And Mend: Halfway Through!


If you've been reading this blog for a while now, you should probably known about Jen. Jen decided to buy nothing brand new for one whole year from September 2012 and in the thrifty spirit called it her Make Do And Mend Year. She has come on in leaps and bounds since she started and has had a fair amount of attention for this brave journey, recently her blog reached over 200 followers and she's been on BBC Radio multiple times updating the public on her mission. But we've missed her at The Vintage Fair, so it's time for an update, over to Jen!

-----------------------------------------------------------------------------------------------------------


Hello again Vintage lovers!

It’s been a little while since I last updated you, BUT the big news is I am HALFWAY through My Make Do and Mend Year-my year of buying nothing new! That’s right, 6 months have passed, and I thought it would be a good opportunity to take stock and document what I have learned so far. So here is my Top 10 Things I Have Learned about Buying Nothing New (so far...!)

1.        It will change your life! In a good way. Just by stopping and thinking a little bit about other alternatives to new before you rush out and buy something, can make a HUGE difference, not just to your life, but also in the grander scheme of things (I'm talking saving the planet here people-it's BIG stuff!). A little bit of Make Do and Mend can help to #make it better. Just think if we all did it-even just a bit!
2.        More often than not, you don't really NEED the thing you want. I'm not suggesting we should all go around depriving ourselves of the nice, pretty things in life, but if you are going to have to make it, or mend it, or really hunt for it, it kind of helps you clarify what you really need!
3.        Mending things gives a great sense of achievement! You are all no doubt bored by now, of my tales of patching, but it is so satisfying mending something so it can live to fight another day, rather than just chucking it out, and buying a new one. I think our washing basket is testament to this!
4.        You can never have too many glues...Hubby has a stock pile of many different sorts. I have no idea what they are all for, but apparently they are all Very Important. Oh, and get yourself some Sugru.
5.        There are lots of websites now dedicated to giving away stuff-that's right-stuff for free!! Check it out. It is also a great way of 're-homing' stuff you don't want or need anymore-allowing you the self-satisfied glow that it has gone to someone who really needs/wants it AND you've saved it from landfill. Give and Take days, or Swap Shops also seem to be springing up more and more, and are a great, interactive version of the online sites.
6.        There are lots of alternative shopping experiences to be had. As well as the obvious ones like car boots and charity shops, there are flea markets, which are awesome. I used to be scared of antiques shops, and some of them are they very up-market ones, but most are a bit like organised junk shops, so don't be afraid to go in for a rummage! Also, give your local auction house a go. We have one near us, that has an auction every 2 weeks, and you can leave a bid on paper, so you don't actually have to be there in person. And I love, love, LOVE all the vintage markets that there are now as none of it is new!


The Shoreditch Vintage Fair

7.        Beware the bargain!! I bought some slippers for SmallSmall from the charity shop that fell apart, and also some wool that was in skeins and I ended up in a huge tangle with it. Sometimes there is a reason things are in the charity shop!
8. Buying things on E-bay is hard (also be careful, as there is so much new stuff on there now), as until you get it, you don't really know what you are getting.
9.       Plan ahead-things like family birthdays and Christmas are easy to plan for, as you know they are coming up and they are generally at the same time each year..! My top tip for Christmas is to start in June.... Also, if you know you are going to need something at some point, like we need some wellies in the next size up for BigSmall, then keep your eye out before you actually need them, and snap them up if you see some!
10. Think outside the box-sometimes you just have to be a little bit creative. For example-making an egg box Christmas tree..! Another example I was really chuffed with was my mother in law's birthday present-meals for the freezer might not be everyone's present of choice but she was delighted.


So there you have it. I was initially worried I wouldn't be able to come up with ten things, but actually I had many more.
If you haven’t been following, and the references to washing baskets and egg box Christmas trees have passed you by, then stop by and check it all out, at www.mymakedoandmendyear.wordpress.com! And you can follow me on Twitter: @makeandmendyear

Thanks for reading.
Jen x

Thursday, 22 November 2012

My Make Do And Mend Year: Handmade Slippers


Hello Vintage lovers,

Two months into My Make Do and Mend Year, and I know you are all desperate for another update! For the uninitiated, My Make Do and Mend Year is a challenge I have set myself to buy nothing new for a whole year (with a few obvious exceptions, like pants.) It started on the 1st September this year, and so far I have been Making, Making Do, Mending, Thrifting, Re-loving etc with gay abandon.

Highlights this month include:


  • My first mistake (more of a lowlight really)-I bought a new book. Completely by accident, when my brain was caught napping. I was mortified.
  • My first ever radio ‘appearance’-BBC Radio Wiltshire very kindly featured My Make Do and Mend Year on their mid morning show with the lovely Mark O’Donnell
  •  A visit to The Bristol Vintage Fair-I enjoyed a lovely afternoon on my birthday weekend, having a mooch around The Bristol Vintage Fair perusing all the vintage loveliness. I may have even purchased a couple of things (!) and I got to meet the lovely Gina, of The Vintage Fair blog fame.


Now I'm sorry to interrupt the update guys, but Jen has been making some fab things on her challenge and one of the more unusual ones is a home made pair of slippers! I thought this was so odd (yet brilliant) that we would share Jen's tutorial with you all. 


You will need:


  • a wool jumper-has to be at least 80% wool, and keep an eye out for a handwash only symbol on the label. You will be (intentionally) shrinking it, so the last thing you want is something that has been treated to make it safe to machine wash)
  • some A4 paper and a pen
  • a ruler/tape measure
  • a marker pen
  • some scissors
  • a big needle
  • some wool-ideally in colour that match /complement your jumper
  • patches of suede or similar if you want to ‘non-slip’ the bottom-mine were from a charity shop suede skirt that I picked up for less than £5, and that will hopefully provide enough patches for all of our slippers

First, you need to felt your jumpers. This essentially means shrinking them. My understanding is that this is so that all the wool sticks together and won’t unravel when you cut it. Put your jumper into the washing machine on a hot wash. It helps if you put a pair of jeans or 2 in with it, as this bashes it about a bit more, and makes it felt better. I think I did 2 jumpers at the same time, with a pair of jeans, at 60C, with a normal speed spin etc. Then I laid them out flat to dry.


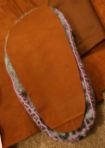
You need to take your paper and draw as best you can, around the shape of your foot. Then draw a kind of oval shape around your foot template going about 1cm wider around the sides and just a couple of mm above and below-hopefully the picture below will explain this better than I can:


For the upper pieces:
Draw around your foot again on a new piece of paper. Then draw a smooth curved line about 0.5-1cm above your toes-when you get to your little toe and your big toe continue the curve around and then draw a straight line vertically down to the bottom of the paper.
You then need to cut out a rectangle (this is where your foot will ‘emerge’ from the slipper)-mark about 3-3.5cm in from the edge of your straight lines at the bottom on either side. Then about 2/3 of the way up your foot shape, mark about 2.5cm in on wither side, and then join these points up to make a rectangle-again the picture below should help:


Now you are ready to cut out your fabric pieces!
Place your sole pattern piece on the wrong side of your felted jumper, draw around it with a marker pen, then flip the pattern piece over and repeat (to get a left and a right sole piece with the ‘pretty’ bit of your jumper showing on the outside)
Then place your upper pattern piece on the right side of you jumper and repeat the steps above so that you have a right and a left upper piece, with the nice pattern of your jumper (if it is patterned) showing on the upper side.
I wanted grippy bits in my sole pieces, as I was worried about skating around our tiled kitchen floor, and thought it would be a bit more hard wearing, so I cut 2 pieces out of suede skirt that were about 1cm smaller all around than my sole pattern piece.

Blanket stitch around the edge of the suede piece. If you never blanket stitched before, or even heard of the term blanket stitching, there is a You Tube video here (by Gulf Coast Cottage) which I think shows you far better than I could try and explain it!    I didn’t tie a knot in the end of my wool as I thought this might be uncomfortable to walk on, I just did a ‘normal’ stitch at the beginning and went over it about 3 times.
It is quite tough to go through all the layers at once with your needle, so if you are struggling, pull your needle all the way through the suede bit before trying to go into the woolly bit (does that make sense?)
Once you have done this for both soles and have 2 lined sole bits, basically pin the 2 left foot bits together (place your pins parallel to the join, not perpendicular), wrong sides together. On one of mine for some reason, I needed to stretch it slightly to get the side bits to meet at the back. So place a couple of pins at the toes and then see if your bits will meet at the back. If they won’t, then don’t panic, just stretch the wool slightly as you are pinning around and the 2 side bits should meet just fine. If on the other hand, you have too much fabric at the back after pinning, then you can simply cut a bit off each side so that they can be pinned without any overlap.
Repeat for the right foot.


Then you need to blanket stitch the two bits together.
At the beginning,I just did 2 or stitches on top of each other, but you could tie a knot, and then when you start just sew one stitch through only the top Then you need to blanket stitch the two bits together. At the beginning,I just did 2 or stitches on top of each other, but you could tie a knot, and then when you start just sew one stitch through only the top layer and then your knot would be buried in between the two layers of fabric.
Then you need to make trim bit for around the top of your slippers. Measure around the opening of your slippers. From the wastiaband bit of your jumper. Cut 2 strips that are about 2-3cm shorter than you just measured, and about 3-4cm wide. Then pin the trim piece to your upper piece right sides together, and sew together with matching wool, using a back stitch (You Tube video here from Expert Village). You have to really stretch out the trim piece as you are sewing to make it fit around and this then ensures that your foot hole is nice and snug and your slipper stays on. Then you just basically fold the trim bit upwards, et voila!
You can embellish your trim bit with buttons if you like, or just be lazy like me and leave it plain.


You can read all about what I have been up to in far too much detail on the blog:
http://mymakedoandmendyear.wordpress.comhttp://mymakedoandmendyear.wordpress.com
or you can find me on Facebook by searching for My Make Do and Mend Year, or you can tweet me at @makeandmendyear

Thanks for reading!
Jen xxx

Friday, 5 October 2012

Jen's "Make Do And Mend" update.


Hello Vintage lovers!

Well, it’s one month into My Make Do and Mend Year, and I know you are all desperate to know how it’s been going…

For the uninitiated, My Make Do and Mend Year is a challenge I have set myself to buy nothing new for a whole year (with a few obvious exceptions, like pants.) It started on the 1st September this year, and so far I have been making, making do, mending, thrifting, re-loving etc with gay abandon. Overall, it is going really well and I’m thoroughly enjoying myself.

Possibly the best way to summarise the month’s goings on is to split them in to Making, Making Do and Mending.

Making

  • I have made 2 children's birthday presents, both very pink!


  • A previously undiscovered love of charity shop clothes! I have loved a good rummage around the bric a brac sections of charity shops for ages now, but never really looked much a the clothes, and was always amazed by other people’s finds. I have a wardrobe full of perfectly functional clothes, but have still felt the need to buy 4,yes 4, new dresses. Having never really been a dress person, I am now a convert, and can often be seen sporting cutting edge fashion dresses… And they were all less than £5 each, so that’s ok. Isn’t it..?


Making Do
This is a very exciting category, as it’s just stuff I’ve decided not to bother replacing or trying to fix! 
I bought some second-hand boots from E-bay, which when they arrived weren’t quite what I wanted and I certainly wouldn’t have bought them if I had seen them in the shops. The temptation to re-list them and try and find some better ones was strong, but after some soul searching and consulting the good people of Facebook land (!) I decided to suck it up and Make Do.


Mending
This has been the biggest learning curve. I’m sure not so much stuff used to get broken! Or maybe if it did, we just threw it out (gasp) and didn’t really think about it, or if we mended it, I wasn’t so conscious of doing it (because I wasn’t blogging about it I guess)


  • We have instigated a ‘Fix-it box’ where all the poorly things go while they are awaiting fixing. I was being driven mad by everything just being left in random places (usually windowsills, bizarrely) waiting for new batteries or a little TLC. So now it all goes in the box, and if it is too big to fit in the box then a note gets put in instead. It seems to working pretty well so far.
  • I have sewn a patch on a hole in hubby's jeans.
  • And it’s kind of not really mending and not really making do, but I embellished a charity shop jumper with some buttons to hide a grubby neckline!


All exciting stuff…

The hardest thing has been losing that instant mentality. If we need something, for example, we all currently need new slippers, instead of just popping out to Tesco’s or wherever and getting them, I have been scouring charity shops and car boots, and have yet to find any, so I am even contemplating making some (does that make me a bit mad…?)

The best thing has been discovering new skills, like learning to patch trousers, and that very satisfied (verging on smug) feeling you mend something!

You can read all about what I have been up to in far too much detail on the blog:
or you can find me on Facebook by searching for My Make Do and Mend Year, or you can tweet my @makeandmendyear

Thanks for reading!

Wednesday, 12 September 2012

Make Do And Mend Year


Vintage fans, meet Jen. Jen is our first guest blogger and she's about to embark on a year of thriftiness. We are going to be checking in with her along the way but she's only just got started, so I'll hand you over to the lady herself.


"My name is Jen, I live in the South-West of England, with my lovely hubby, our two fantastic, amazing little boys-BigSmall who is nearly 4, and SmallSmall who is 1, and two crazy cats called Nigella and Clarrisa.
                                    
I started sewing just after our first little person was born, having never even touched a sewing machine before, and then discovered crafting of all sorts. Along the way I also found a new love when I stumbled upon the vintage and retro revival that is so big at the moment, and now I am a devout upcycler and vintage lover, so making and re-loving old and vintage items is very much a part of my life.

But then I decided I needed to take it one step further, and launched myself in to the challenge of My Make Do and Mend Year.
"My Make Do and Mend Year" is basically this: a personal challenge, to go a whole year without buying anything new. So I can choose to make, make do, or mend, but I can’t buy new. I can buy secondhand, pre-loved, re-conditioned, vintage, retro…just not brand spanking new. And it all starts on the 1st September 2012.

Essentially I'm doing this because Making Do and Mending is good for the planet, good for the bank balance and good for the soul! In our family, we are in the very fortunate position where we have nearly everything we NEED, and most of what we want. We really don’t need any more stuff. And the planet certainly doesn’t need any more stuff. And my bank balance could do with a break from buying stuff! It also dawned on me that the things in our house that I like the most, are the one’s that have taken a bit of thought and time and love (a bit like the children…), and not the instant fixes we've gone out and bought with little or no thought.
                            
If I can just stop for a minute before I buy things, and think ‘do I really need this?’ then I might buy less, buy better and spend less. If I don’t really need it, then I have to ask how much I want it, and if I really want it, then I should be prepared to wait a little bit longer and look a little bit harder, until I find what I want second hand, or can make something similar!


Hopes
That it will all be a breeze, we’ll sail through with no problems, making beautiful things, falling across gorgeous vintage finds, mending things in fiendishly clever ways, and stoically making do when this isn’t possible…
Seriously though-I hope that it will make us, as a family, more aware of what we’re buying. It takes out that instant gratification part of buying, as everything will involve more thought and planning.  In turn, I hope that this will make up more appreciative of what we already have, and what we do buy.
I’m looking forwards to having to be more inventive and there is a part of me that is really relishing the prospect of ‘making do’, and the challenge of thrifting and making and mending. Plus, it’s an ideal excuse for visiting vintage fairs and flea markets…!
                             
                                                                         
Fears

There is a tiny part of me convinced that on the 1st September, the boiler will blow up, the car will break down and the fridge will stop working, all at once and all in spectacular fashion.
I know I will really miss magazines. I love leafing through vintage and crafty mags, lusting after the gorgeous things, and adding to my ever increasing ‘want to make’ list.
I’m not sure I’m going to be very good at ‘making do’. I’m quite impatient and not very tolerant of things when they aren’t exactly as I want them. Hmmmm, can anyone spot a potential stumbling block here?!
And lastly, I’m already slightly worried about Christmas!"


Follow Jen as she embarks on her challenge, and throughout the year ahead, on the blog: http://www.mymakedoandmendyear.wordpress.com

Follow my blog with Bloglovin